
[1] At first, Download the IOIO Inventor application from Google Play and install to your android device

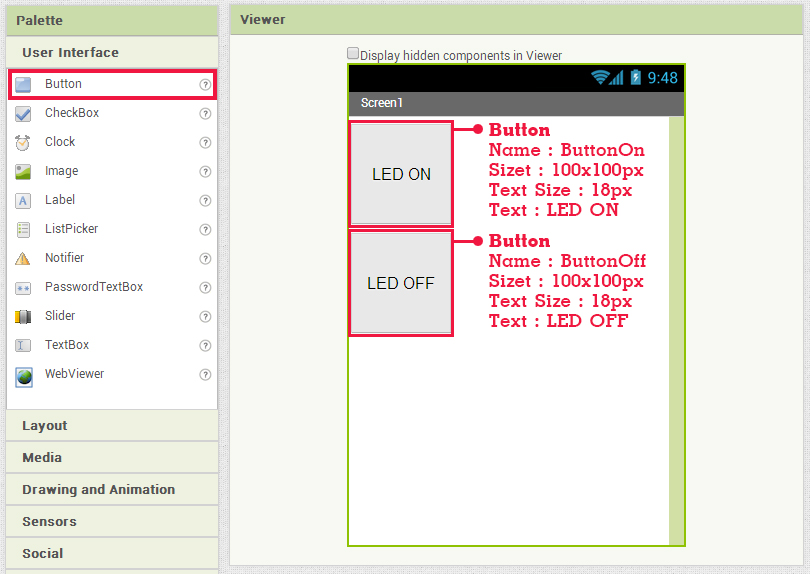
[2] When installation is complete, don’t open it now. Go to App Inventor website (http://ai2.appinventor.mit.edu/) then create a project. I named it “IOIOSimpleLED” and drag two buttons on Palette window to Viewer window. By properties configuration as shown.
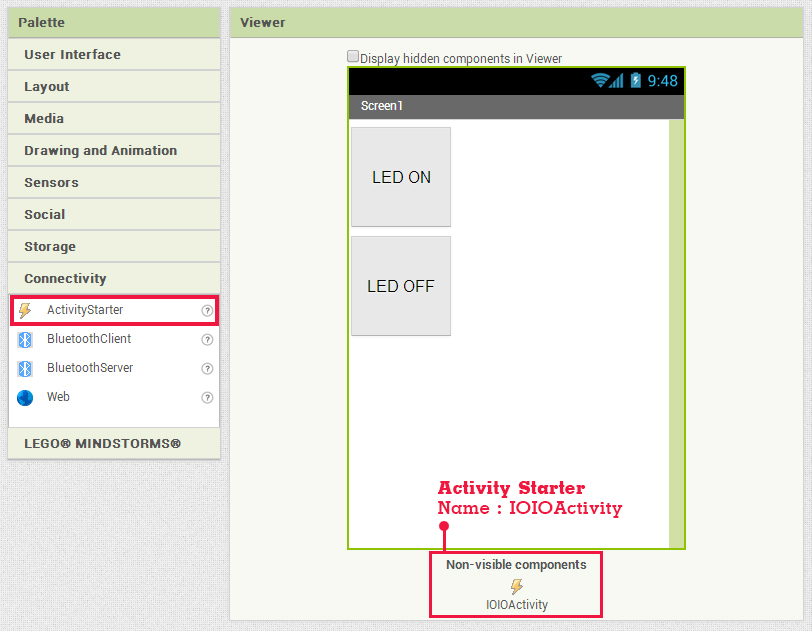
[3] Drag an Activity Starter on Palette windows to Viewer window. Activity Starter didn’t show on screen because it is non-visible components. It will be shown below the screen. By properties configuration as shown.
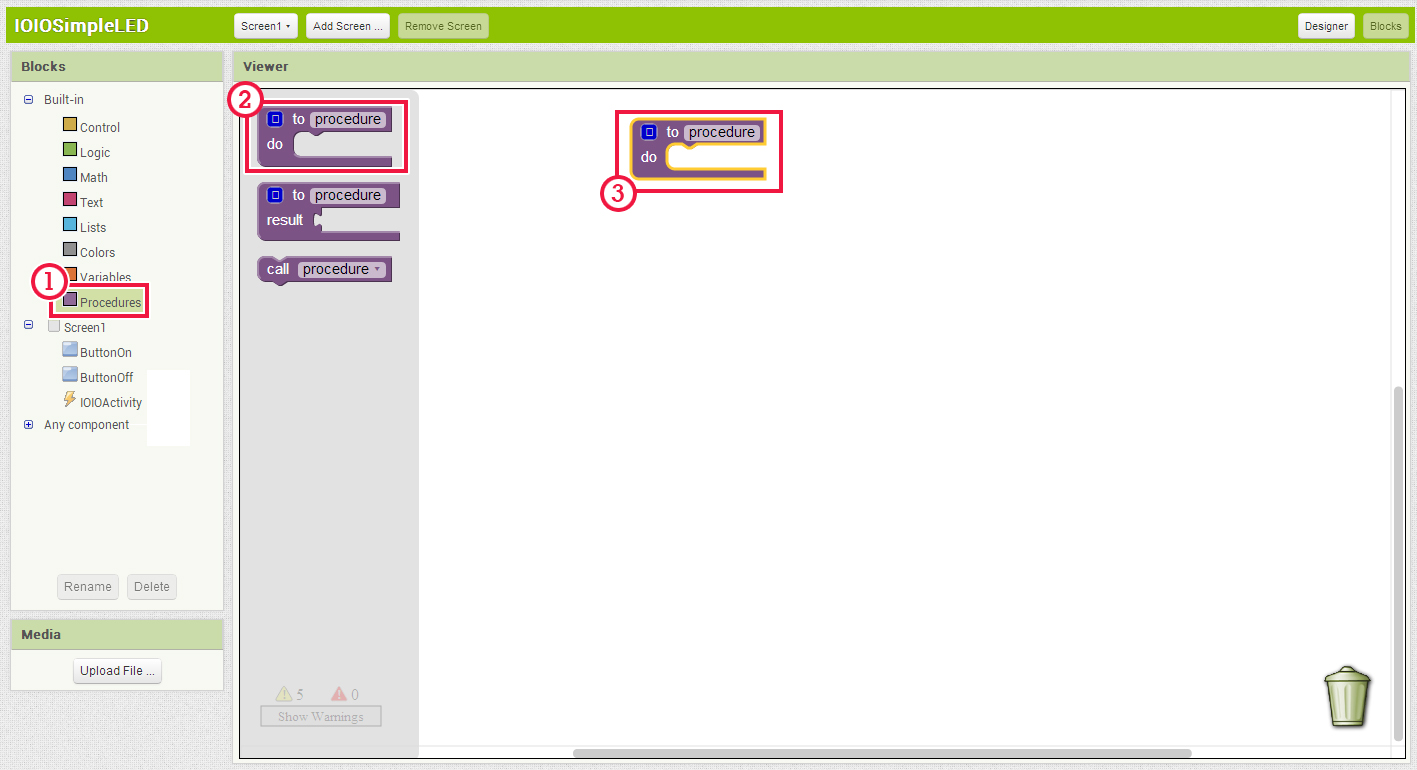
[4] Go to Blocks, choose Procedures and drag “to do” block to workspace.
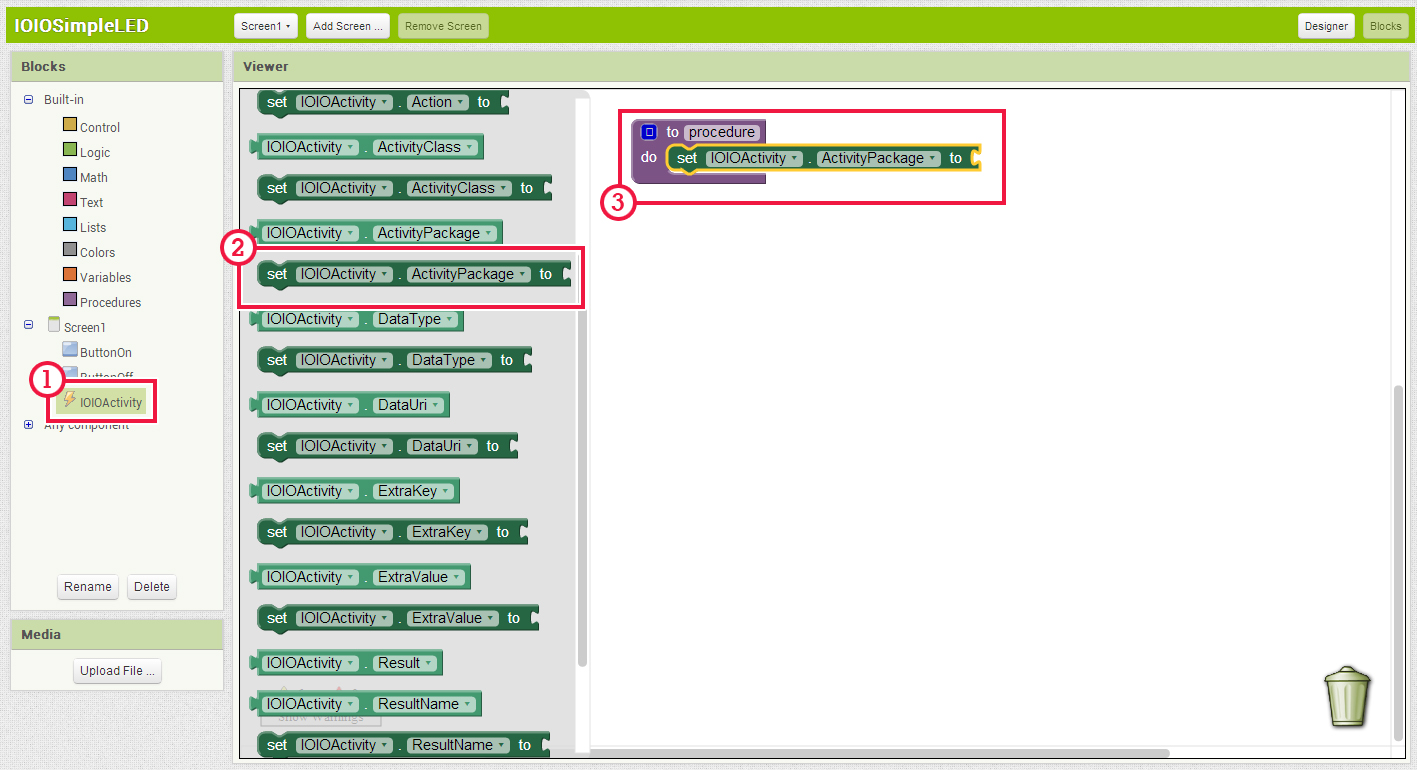
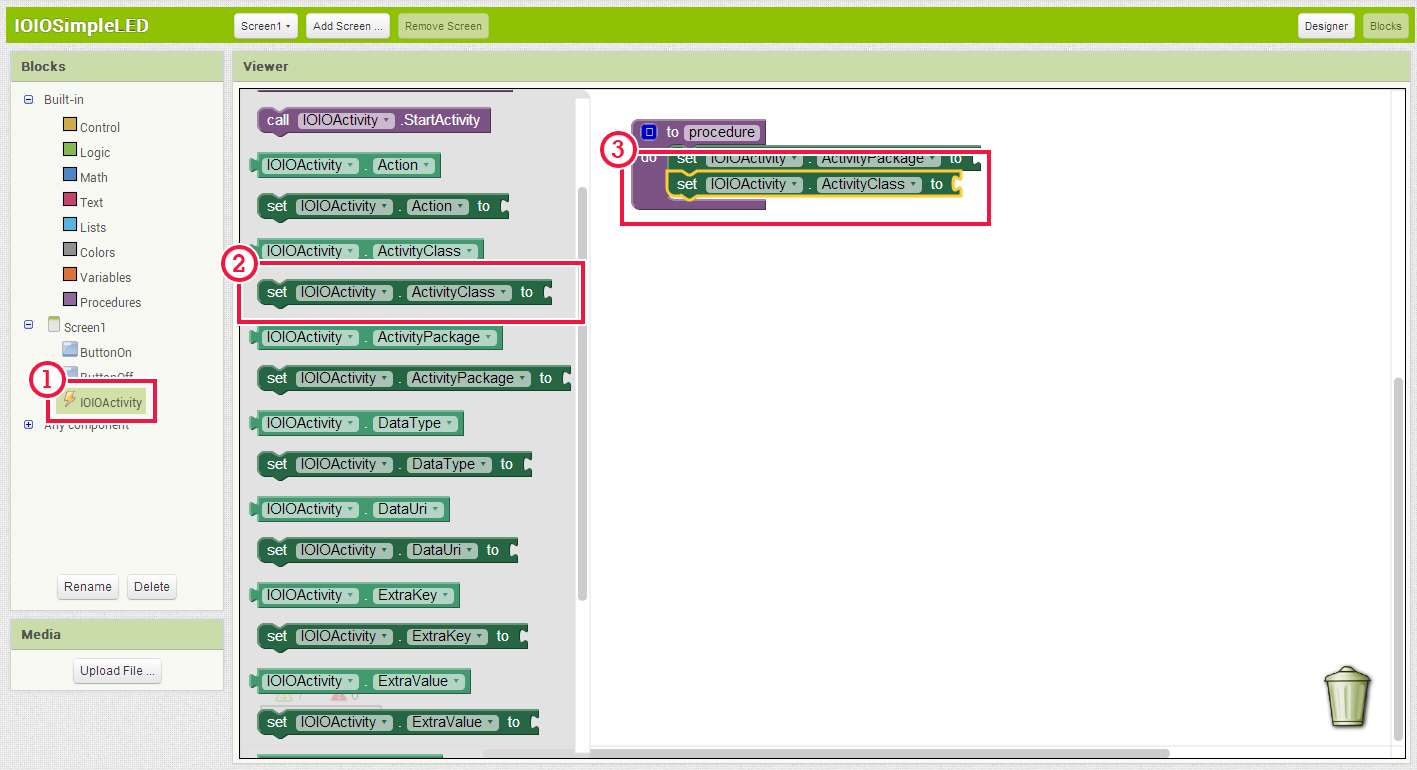
[5] Choose “IOIOActivity” (depending on Activity Startert name) and drag “set ActivityPackage” block to workspace by connect with “to do” block.
[6] Choose “IOIOActivity” and drag “set ActivityClass ” block to workspace by put it next to “set ActivityClass” block.
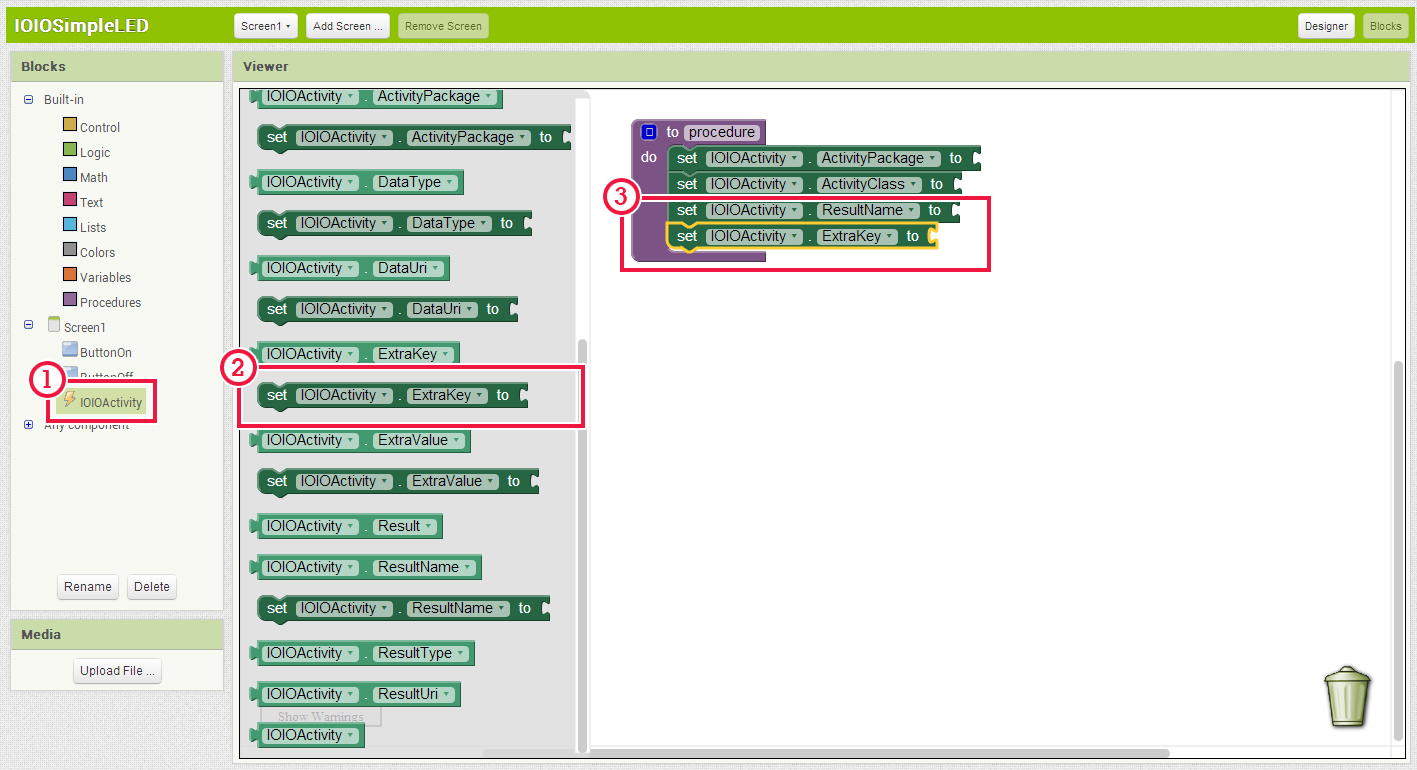
[7] Choose “IOIOActivity” and drag “set ResultName” block to workspace by put it next to “set ActivityPackage” block.

[8] Choose “IOIOActivity” and drag “set ExtraKey” block to workspace by put it next to “set ResultName” block.
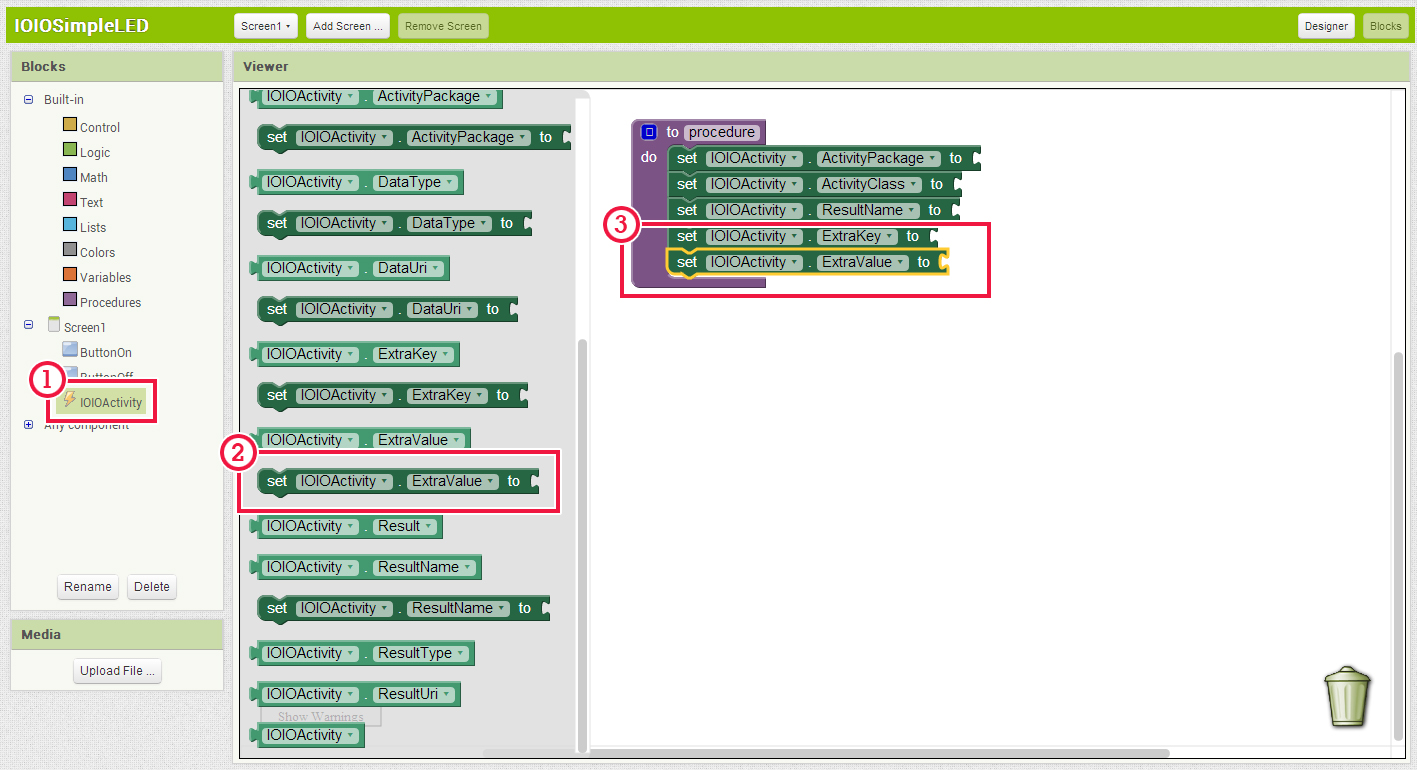
[9] Choose “IOIOActivity” and drag “set ExtraValue” block to workspace by put it next to “set ExtraKey” block.
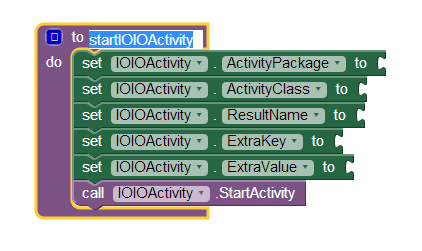
[10] Choose “IOIOActivity” and drag “start Activity” block to workspace by put it next to “set ExtraValue” block.

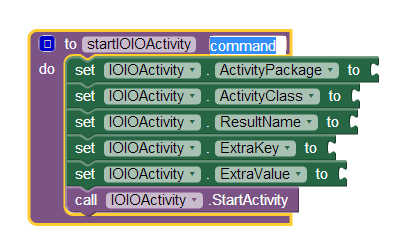
[11] Highlight on “procedure” in “to do” block and change to any procedure name. I named it to “startIOIOActivity”.
[12] Click on blue square button in “to do” block. You will see sub window. Drag “input” block on the left of sub window to right of sub window by put it inside “inputs” block.
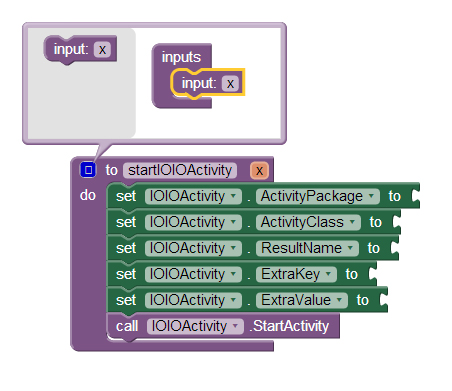
[13] Inside “input” block, x is parameter name of this function. You can change this parameter name and I change it to “command”.
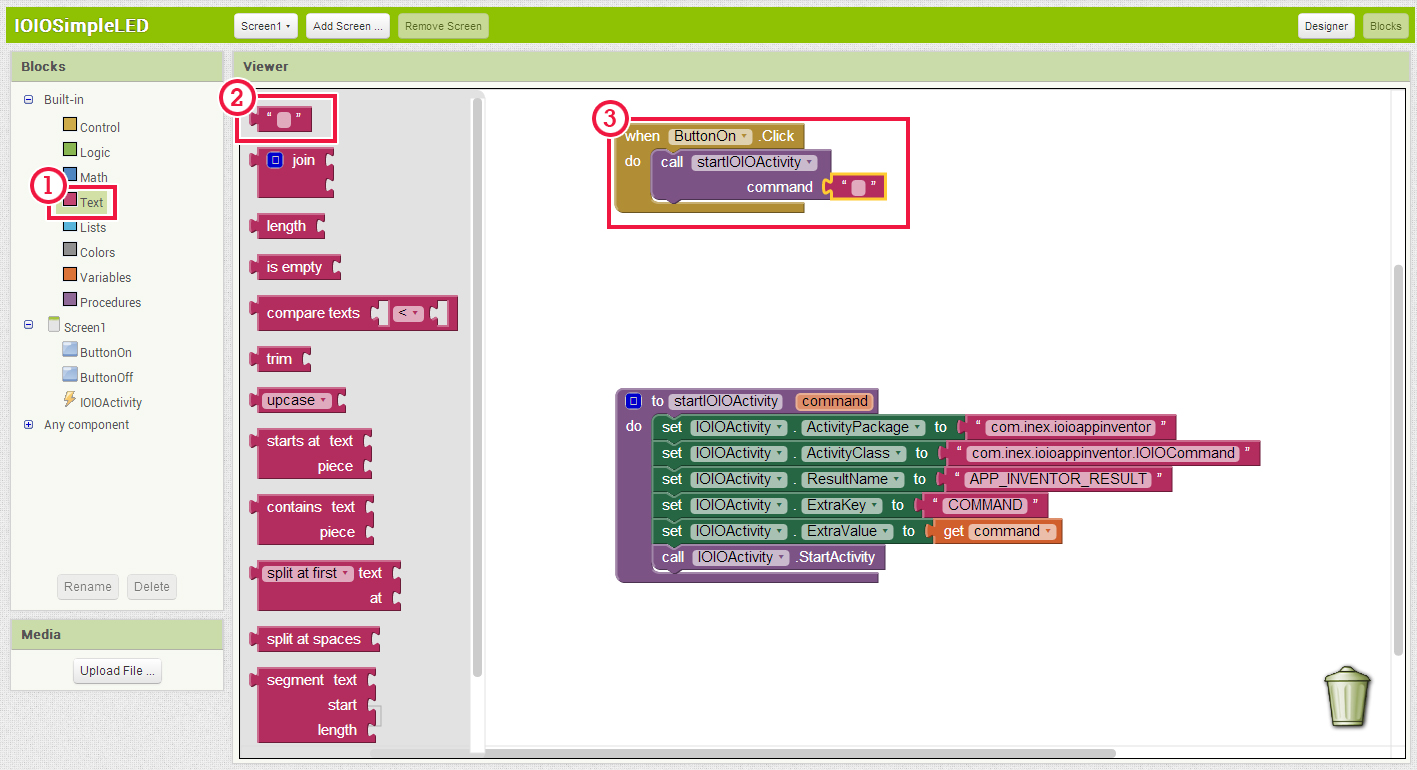
[14] Choose “Text” and drag blank block (first block) to workspace by put it append to “set ActivityPackage” block.
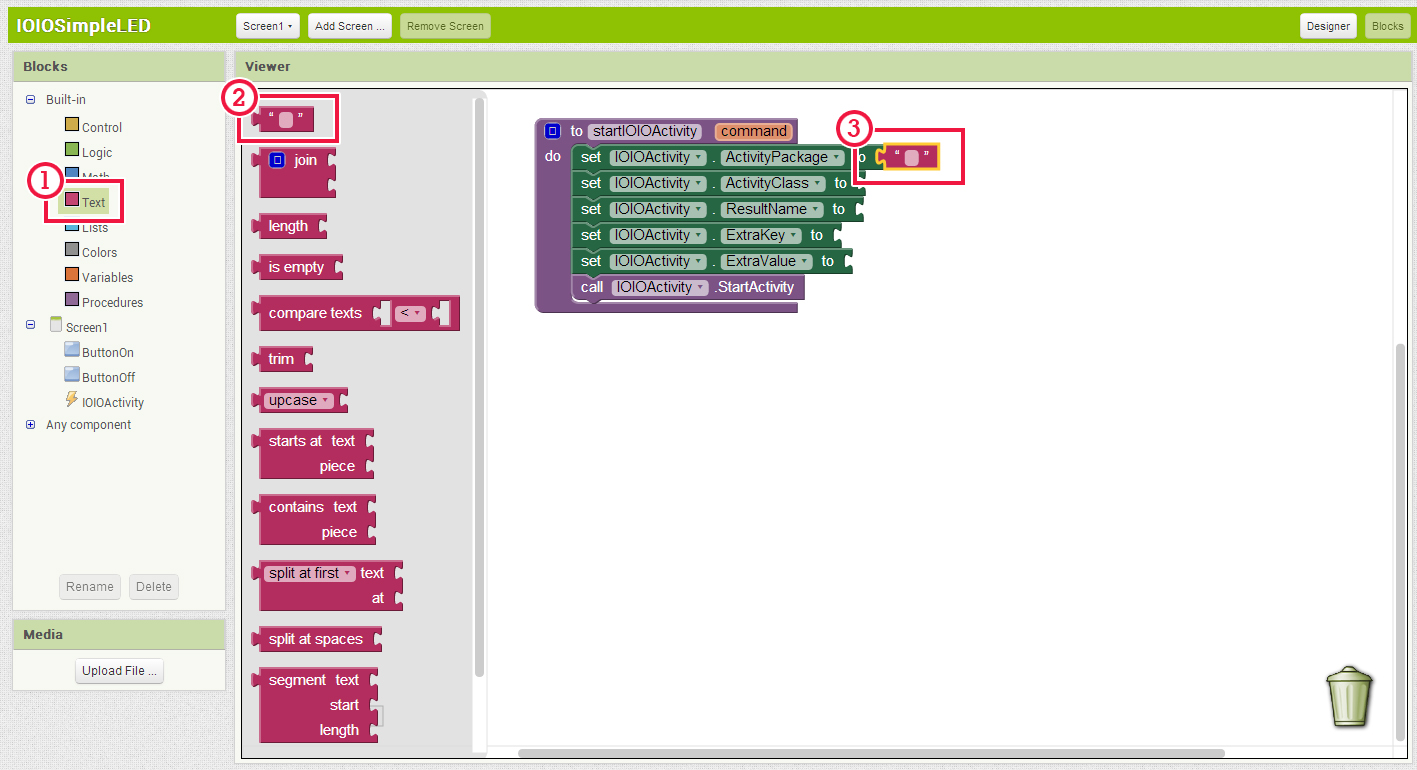
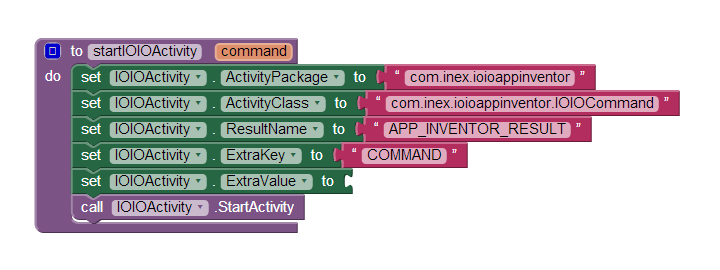
[15] Drag black block from “Text” to all green blocks on workspace, except a “set ExtraValue” block. And define all blank blocks as follows.
** Please check on IOIO Inventor’s package name. If you has downloaded on “com.inex.ioioappinventorinter” package name, please change from
- “com.inex.ioioappinventor” to “com.inex.ioioappinventorinter”
- “com.inex.ioioappinventor.IOIOCommand” to “com.inex.ioioappinventor.IOIOCommand”
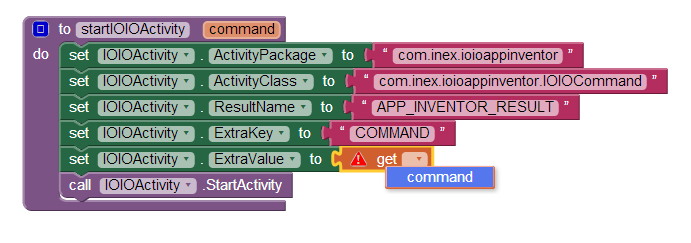
[16] Choose “Variable” and drag “get” block to workspace by put it append to “set ExtraValue”block.
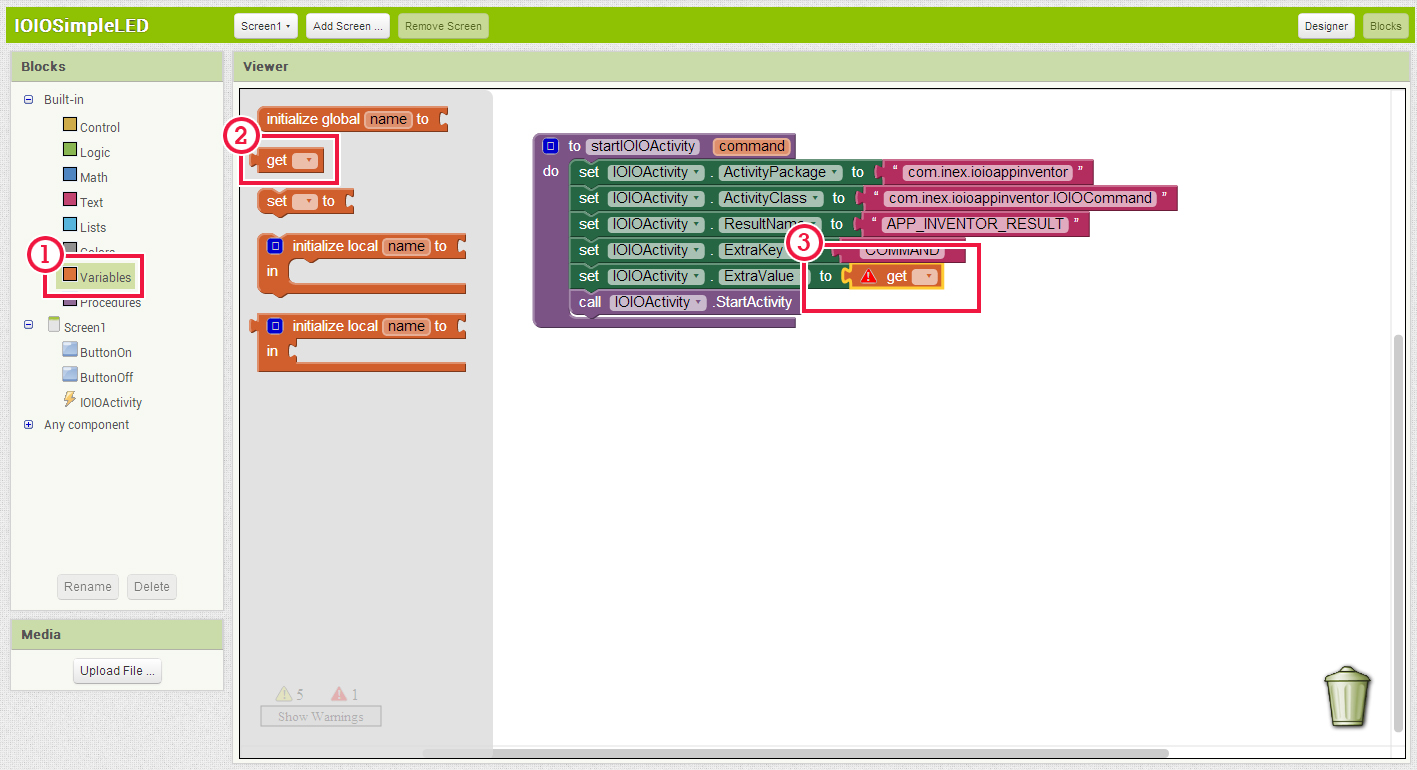
[17] Click on down arrow on “get” block and choose “command” which have define in section 13
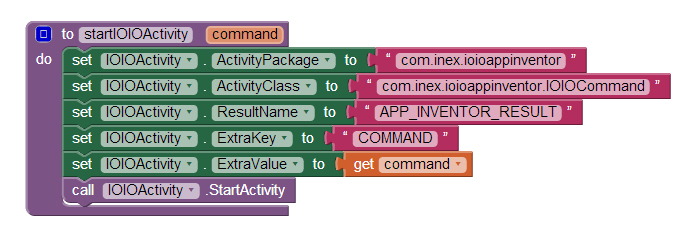
[18] This is function for sending command to IOIO Inventor. All application which building from App Inventor need to define function like this.
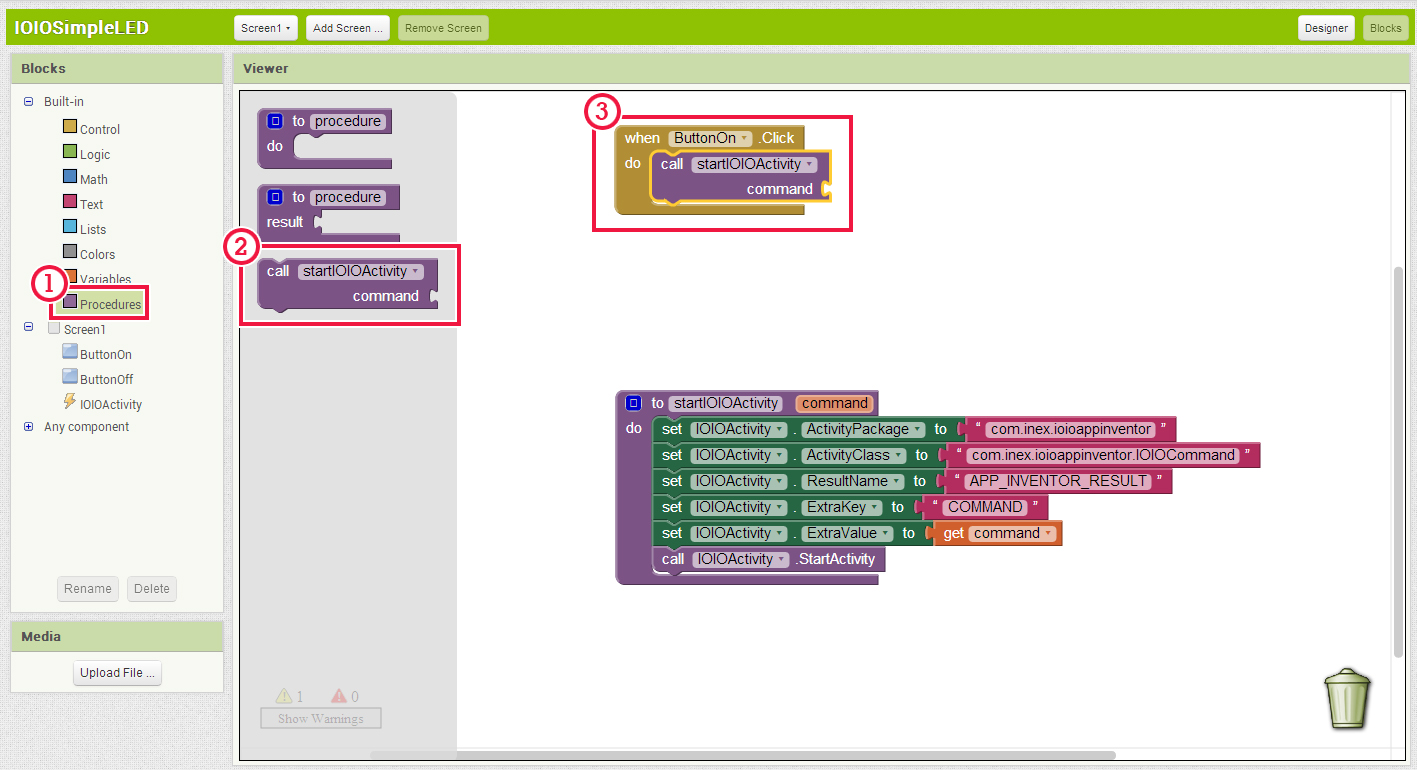
[19] Next, choose “ButtonOn” (depending on button name) and drag “when ButtonOn Click” block (depending on button name) to workspace.

[20] Choose “Procedures” and drag “call StartIOIOActivity command” (depending on procedure name) to workspace by put it in “when ButtonOn Click” block.
[21] “startIOIOActivity” function need to set command parameter by choose “Text” and drag blank block to workspace by put it append on “call StartIOIOActivity command” block.
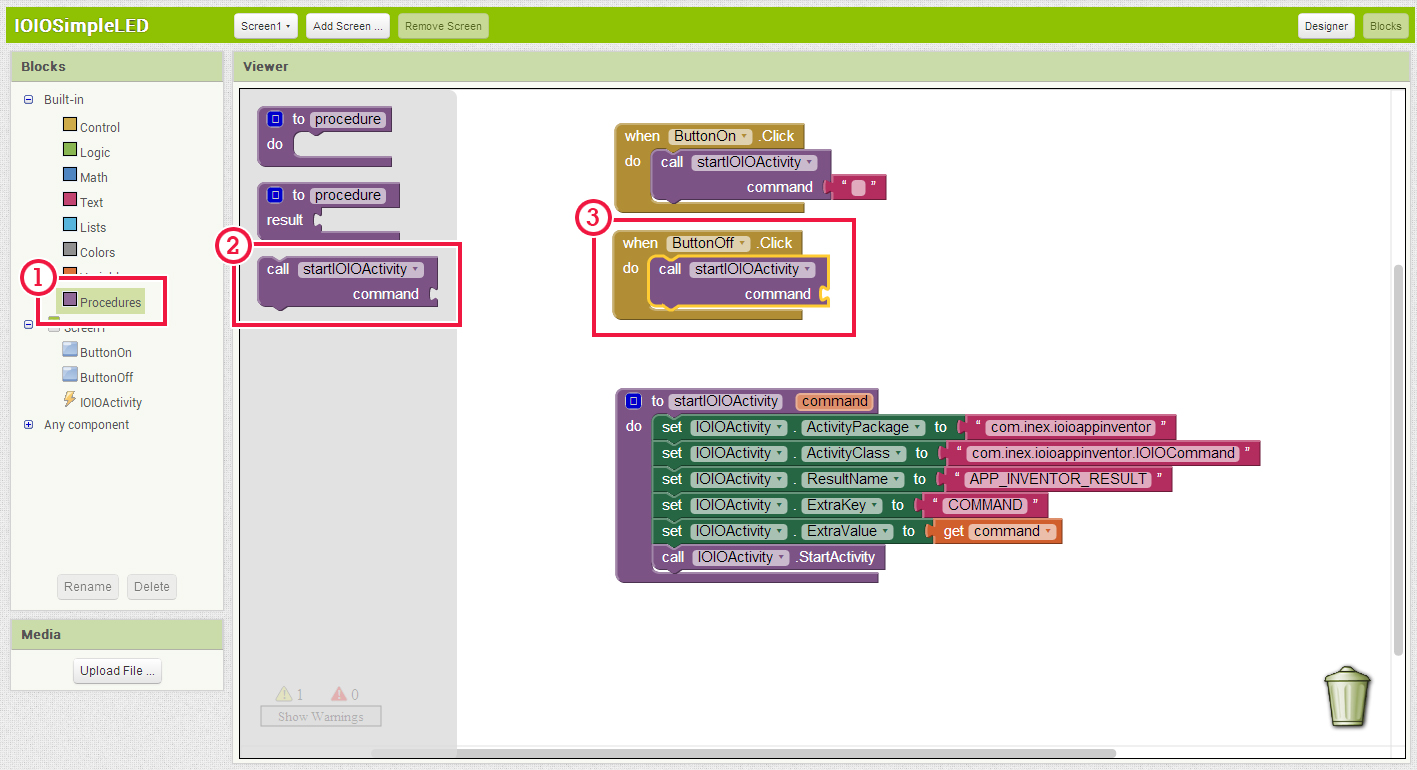
[22] I will not define command in blank block now, but I choose “ButtonOff” and drag “when Click” to workspace.

[23] Choose “Procedures” and drag “call StartIOIOActivity command” to workspace by put it in “when ButtonOff Click” block.
[24] Choose “Text” and drag blank block to workspace by put it append on “call StartIOIOActivity command” block in “when ButtonOff Click” block.

[25] Define command in blank block, follow this.
ButtonOn = DigitalWrite,0,false
ButtonOff = DigitalWrite,0,true
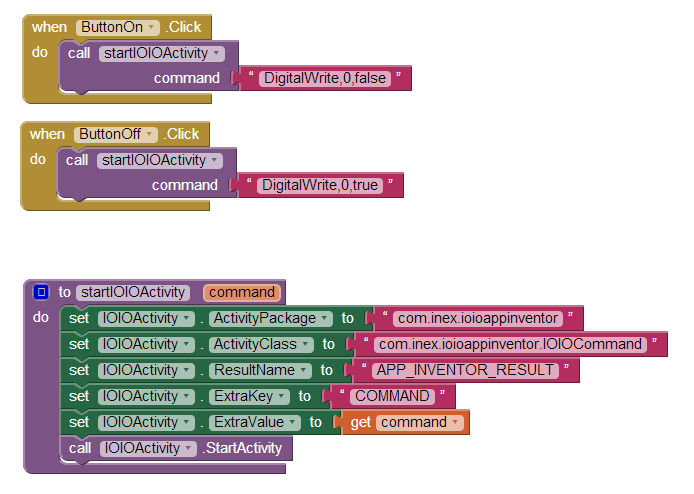
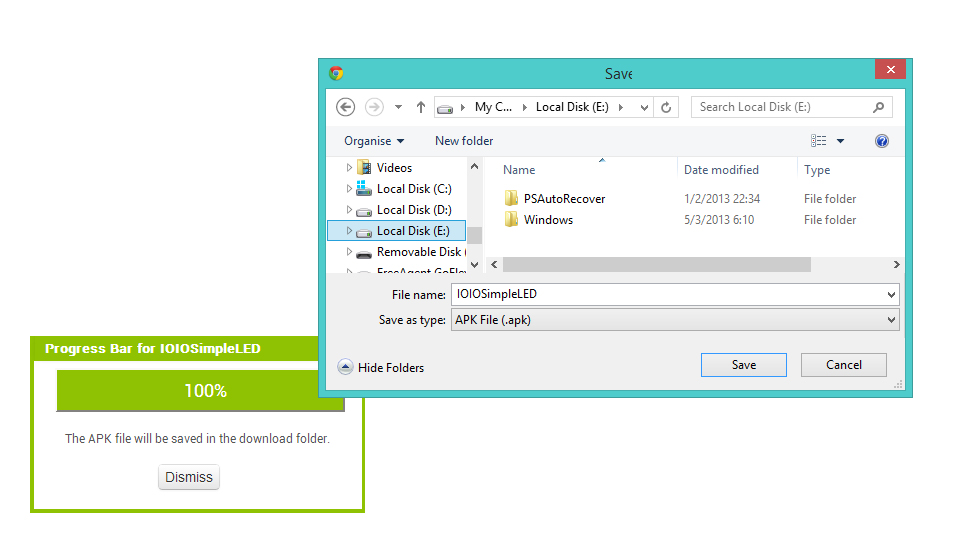
These commands are command for set pin 0 (LED Stat) on IOIO board to high or low where is true is LED turn off and false is LED turn on. (Pin 0 is active low LED) then I defined command on ButtonOn to sending command with false state and ButtonOff to sending command with true state. [26] When everything is finished. Choose “Build” > “App (save .apk to my computer)” to building apk file for install on android device.
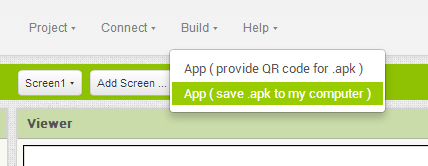
[27] Progress window will appear. Wait until progress is complete then directory windows will appear. Choose directory to save this file. And press “Save”.
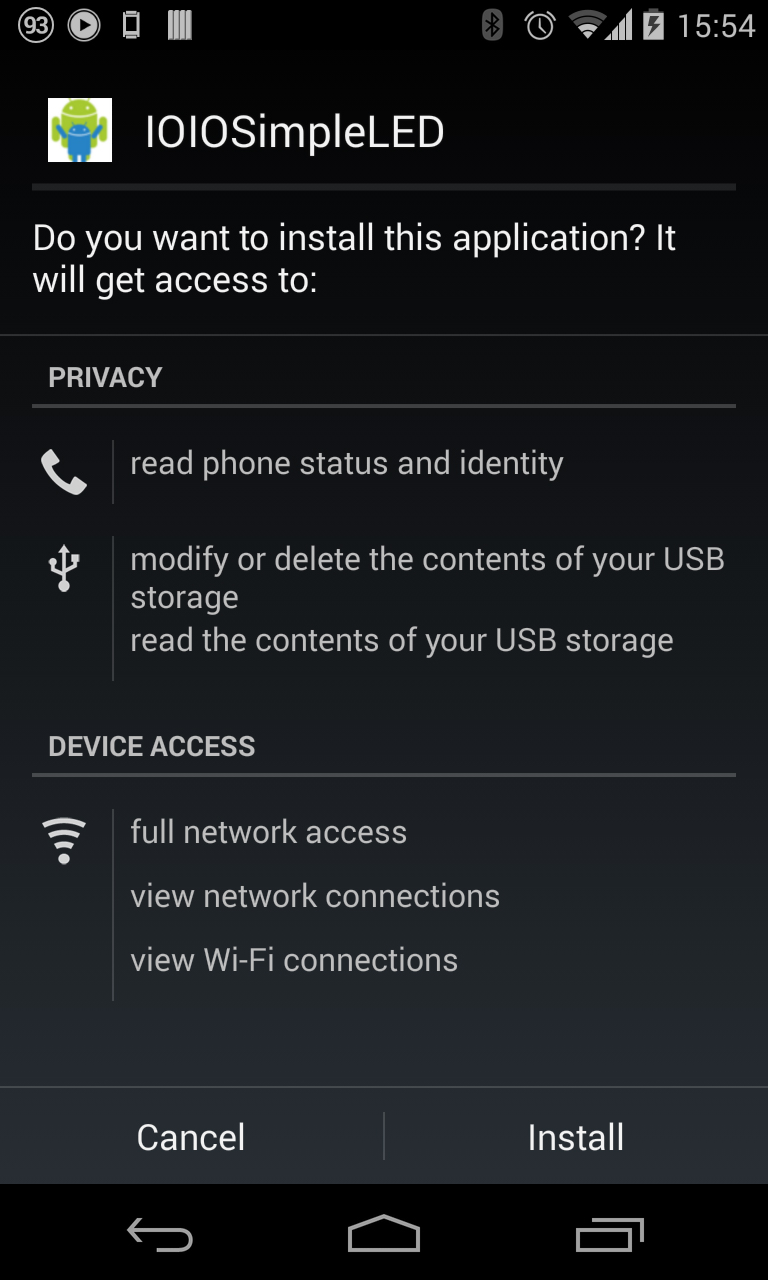
[28] Installing apk file on android device.
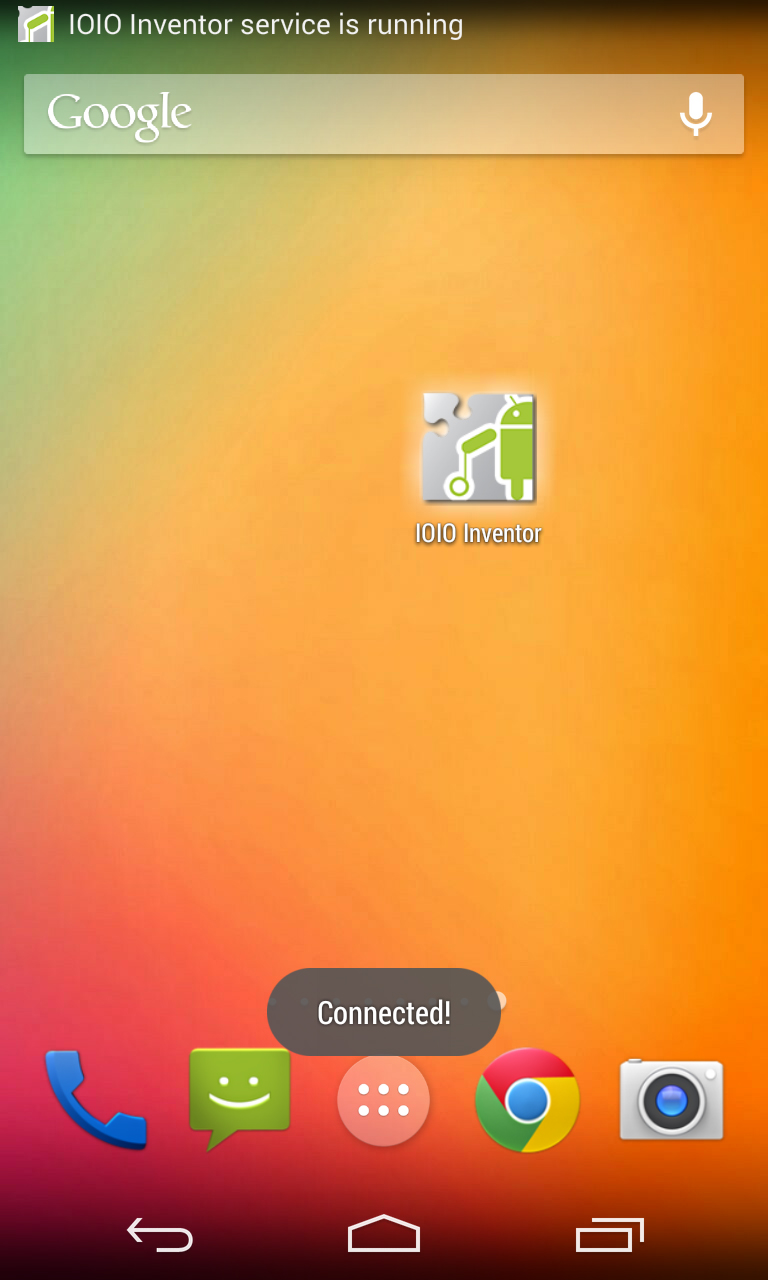
[29] Connected usb cable to IOIO board. If you need to connection via bluetooth, turn it on. and open IOIO Inventor application. This application will not display any screen but it will show a message on notification bar. A “Connected” message will show on screen when IOIO Inventor connected with IOIO board. That means IOIO Inventor application is ready to use.
[30] Open your application and press on “LED ON” button and “LED OFF” button to test your application.
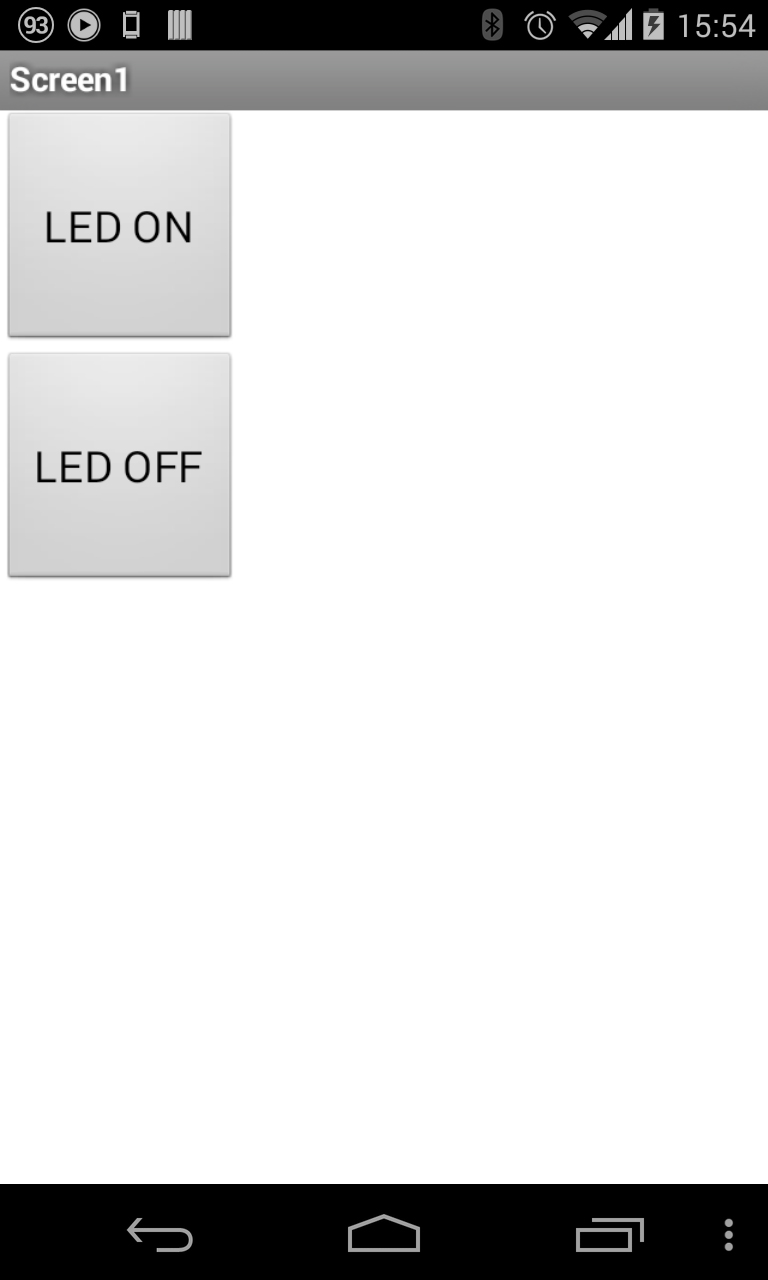
[31] When press on “LED ON” button, led on IOIO board will turn on. And turn off when press on “LED OFF” button.

That’s finish! Now, you can build application from App Inventor to connect with IOIO board.
Related Articles
[IOIO board] How does IOIO Inventor work?
[IOIO board] Command Code on App Inventor for IOIO Inventor