
Line Notify การแจ้งเตือนจากเว็บเซอร์วิสทาง LINE
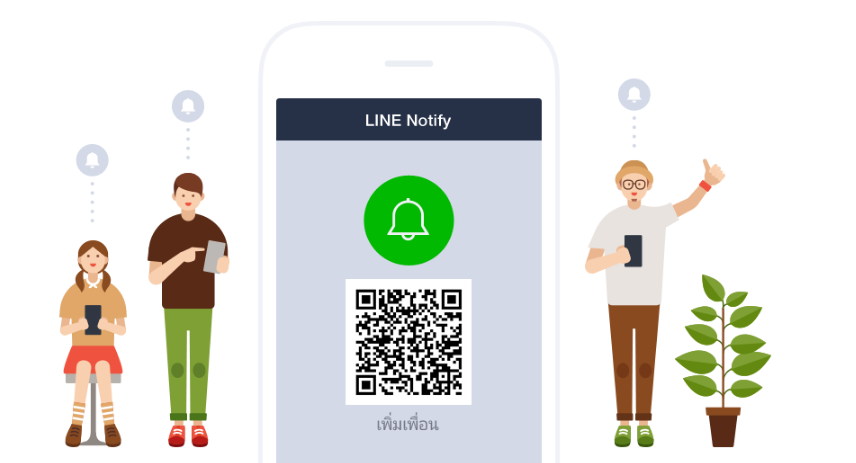
LINE ได้มีบริการแจ้งเตือนจากเว็บเซอร์วิสไปยังผู้ขอรับบริการ แต่ผู้ใช้งานจะต้องเพิ่ม Line Notify เป็นเพื่อนในบัญชีของท่านก่อน Line Notify สามารถส่งได้ทั้งคุณคนเดียวหรือเป็นกลุ่มก็ได้
ขั้นตอนการสมัครใช้งาน
1. ไปที่ https://notify-bot.line.me จากนั้นเลื่อนลงด้านล่างจะเจอ QR Code ให้เพิ่มเพื่อนโดยการสแกน QR Code นี้
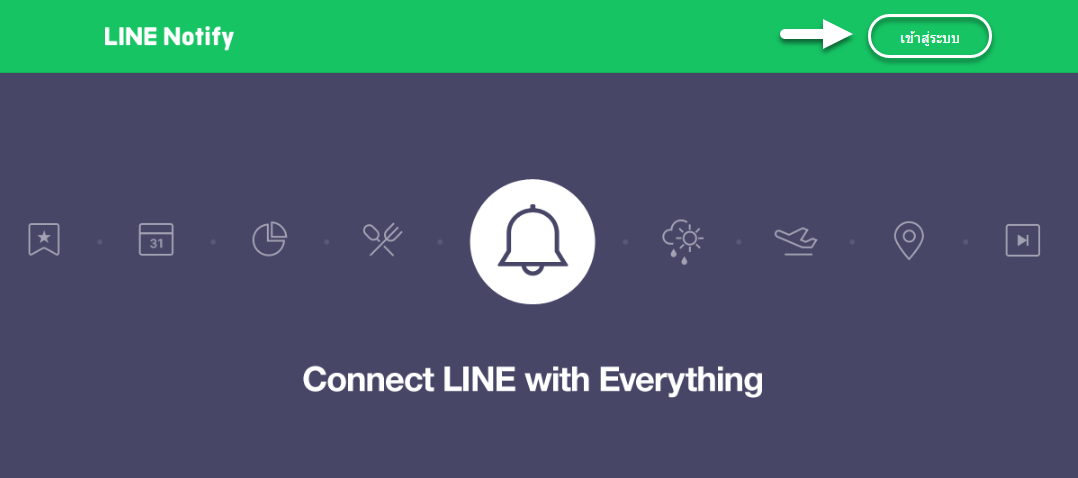
2. จากนั้นไปที่ เข้าสู่ระบบ ดังรูป
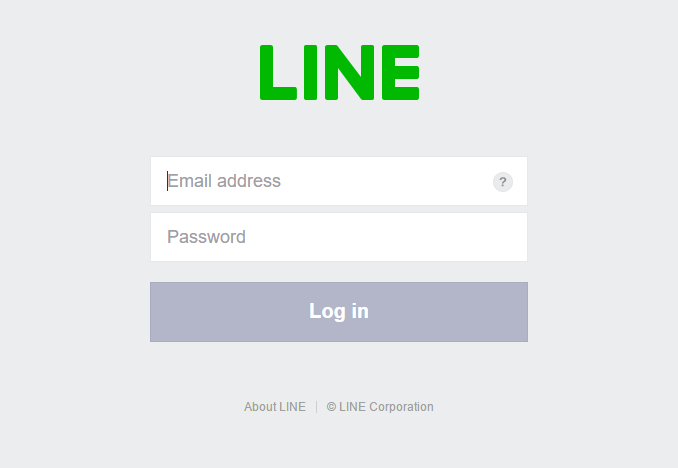
3. ให้ใส่ Email และ รหัสผ่าน ในขั้นตอนนี้ผู้อ่านต้องไปตั้งค่าบัญชี LINE ของท่านให้ลงทะเบียนผ่านอีเมล์ได้ก่อน
4. เมื่อคลิก Log in แล้วตรงส่วนเข้าสู่ระบบจะเปลี่ยนเป็นชื่อบัญชีของผู้ใช้นั้น ให้คลิกตรงรูปลูกศรชี้ลง(หมายเลข 1) แล้วคลิกที่ My page (หมายเลข2)

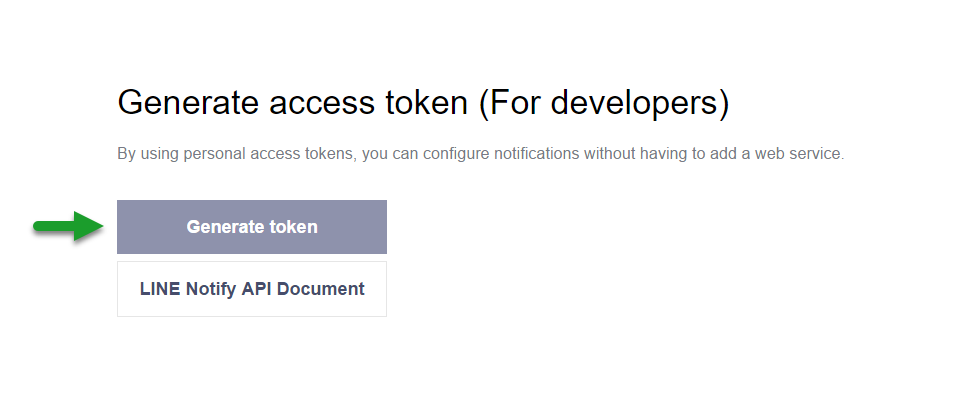
5. เลื่อนลงด้านล่างจากนั้นจะเห็นปุ่มที่มีข้อความว่า Generate token ดังรูปให้คลิกปุ่มเพื่อสร้าง Token
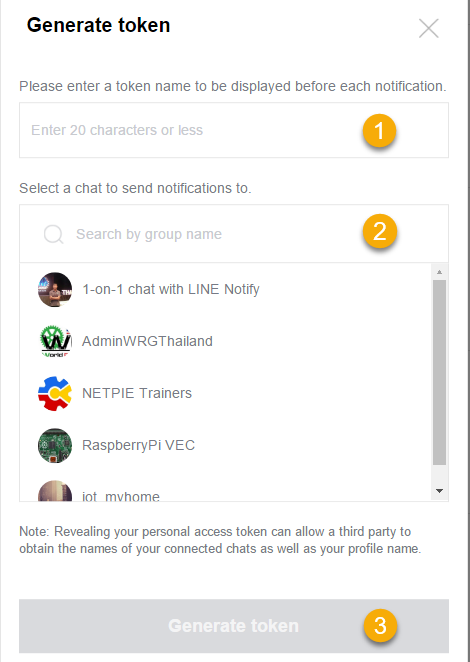
6. กรอกรายละเอียดและเลือกบัญชีปลายทางที่ต้องการรับการแจ้งเตือน
หมายเลข 1 ชื่อ Token
หมายเลข 2 ช่องค้นหาบัญชีปลายทางที่ต้องการส่งถึง
หมายเลข 3 ปุ่มสร้าง Token
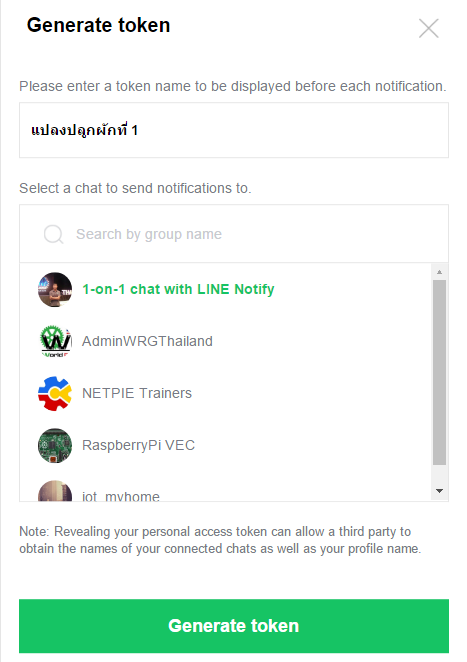
จากตัวอย่าง ตั้งชื่อ Token ว่า “แปลงปลูกผักที่ 1” และเลือกบัญชีปลายทาง 1-on-1 คือบัญชีของเรานั้นเอง ผู้อ่านสามารถเลือกส่งไปยังกลุ่มได้เช่นกัน ให้สังเกตจากสีข้อความจะขึ้นเป็นสีเขียวนั้นหมายถึงท่านได้เลือกใช้บัญชีนั้น
กรณีเลือกส่งไปยังกลุ่ม *หากเลือกเป็นกลุ่มอย่าลืมเชิญ Line Notify เข้าไปในกลุ่มด้วยไม่อย่างนั้นข้อความแจ้งเตือนจะไม่ขึ้น
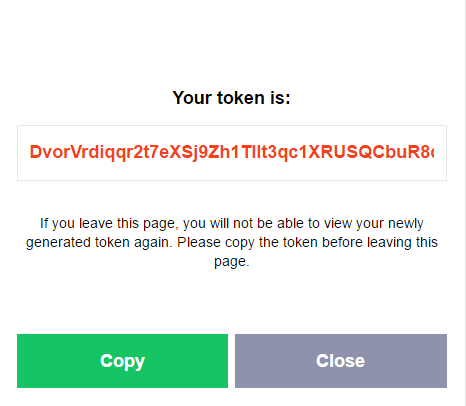
7. จากนั้นคลิกที่ปุ่ม Generate token จะปรากฏ Token ให้คัดลอกเก็บไว้ เพราะท่านจะได้เห็น Token นี้ครั้งเดียวเท่านั้นถ้าหากปิดหน้าต่างไปแล้วจะไม่สามารถเรียกดูได้อีก
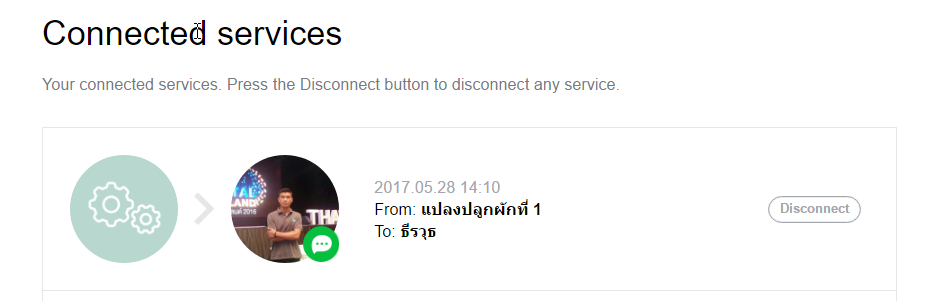
8. เมื่อคลิกปุ่ม Close แล้วจะเห็นชื่อ Token ที่เราได้สร้างไว้ดังรูป หากต้องการยกเลิกให้คลิกปุ่ม Disconnect
ทดสอบการส่งข้อความแจ้งเตือน
ไปที่ https://iot.makersmagazine.in.th/webLine
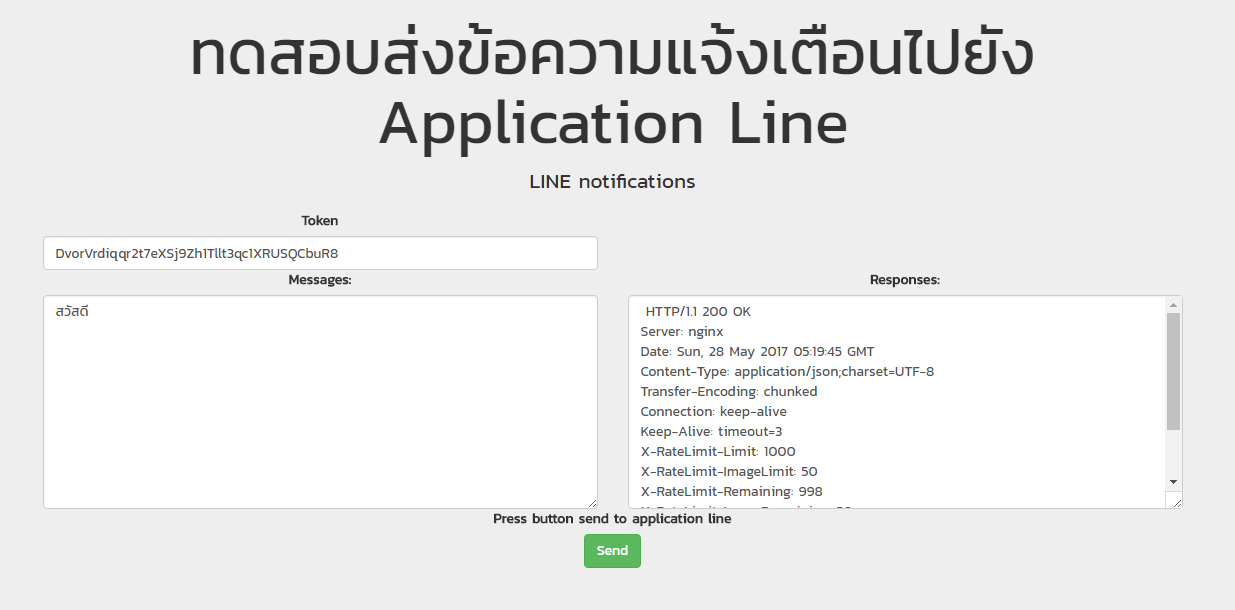
การทดสอบ
1.ใส่ Token ที่ได้จากการขั้นตอนนี้ผ่านมาลงในช่อง Token
2.พิมพ์ข้อความที่ต้องการส่งลงในช่อง Messages
3.กดปุ่ม Send เพื่อส่ง
ช่อง Responses จะแสดงผลลัพธ์ทั้งหมดที่ เว็บเซอร์วิสส่งกลับมา
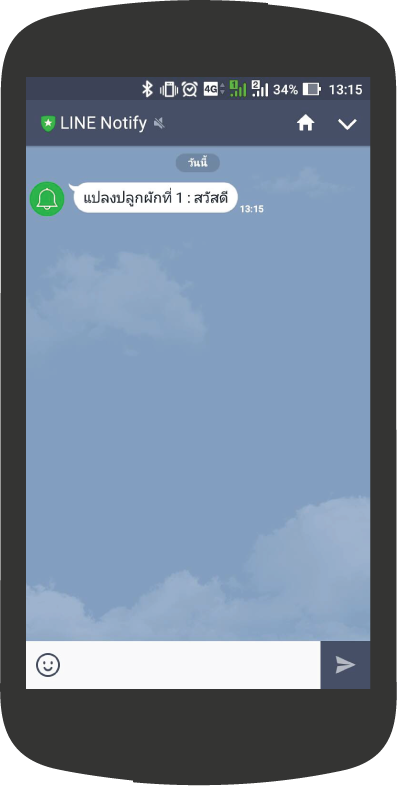
ผลลัพธ์ที่ Application LINE
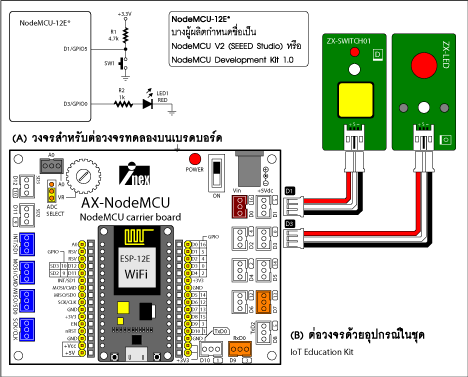
ตัวอย่างการใช้งาน NodeMCU ส่งข้อความแจ้งเตือนไปยัง LINE
ตัวอย่างนี้จะให้ NodeMCU ส่ง LINE ทุกครั้งที่มีการกด ZX-SWITCH01
หากต้องการเรียนรู้และทดลองจริงเกี่ยวกับ iot สามารถคลิกดูสินค้าได้เลย
ตัวอย่างโปรแกรม
#include <ESP8266WiFi.h> //https://github.com/esp8266/Arduino

String LINE_TOKEN = "token ที่ได้มาจากการสร้าง";

#define buttonPin D1 // Define D1 as switch pin
#define ledPin1 D3 // Define D1 as LED pin

// Variables will change:
int ledState = HIGH;         // the current state of the output pin
int buttonState;             // the current reading from the input pin
int lastButtonState = LOW;   // the previous reading from the input pin

const char* ssid     = "your-ssid";   //Wifi Name
const char* password = "your-password";   //Wifi Password

void setup() {

  pinMode(ledPin1, OUTPUT); // Set pin as output
  pinMode(buttonPin, INPUT); // set pin as input

  WiFi.begin(ssid, password);
  Serial.begin(9600);
  while (WiFi.status() != WL_CONNECTED) {
    delay(500);
    Serial.print(".");
  }

  Serial.println("");
  Serial.println("WiFi connected");
  Serial.println("IP address: ");
  Serial.println(WiFi.localIP());

}

void loop() {
  int reading = digitalRead(buttonPin);
  // if the button state has changed:
  if (reading != buttonState) {
    buttonState = reading;

    // only toggle the LED if the new button state is LOW
    if (buttonState == LOW) {
      ledState = !ledState;
      Line_Notify(LINE_TOKEN, "กดปุ่ม ZX-SWITCH01"); // Call funtion Line_Notify();
      delay(100);
    }
  }
  digitalWrite(ledPin1, ledState);  // set the LED:
}

void Line_Notify(String LINE_Token, String message) {

  String msg = String("message=") + message;

  WiFiClientSecure client;
  if (!client.connect("notify-api.line.me", 443)) {
    Serial.println("connection failed");
    return;
  }

  String req = "";
  req += "POST /api/notify HTTP/1.1\r\n";
  req += "Host: notify-api.line.me\r\n";
  req += "Content-Type: application/x-www-form-urlencoded\r\n";
  req += "Authorization: Bearer " + String(LINE_Token) + "\r\n";
  req += "Content-Length: " + String(msg.length()) + "\r\n";
  req += "\r\n";
  req +=  msg;

  client.print(req);

  unsigned long timeout = millis();
  while (client.available() == 0) {
    if (millis() - timeout > 5000) {
      Serial.println(">>> Client Timeout !");
      client.stop();
      return;
    }
  }

  // Read all the lines of the reply from server and print them to Serial
  while (client.available()) {
    String line = client.readStringUntil('\r');
    Serial.print(line);
  }

  Serial.println();
  Serial.println("closing connection");
}